Showing posts with label crafting. Show all posts

February 4, 2019


Wedding Crafting with Mason Jars

Wedding Crafting with Mason Jars


Wedding-crafting-mason-jars-reception-tables


Mason Jars- In or Out for Weddings? 

I was talking to a wedding planner about my July bride and what she wanted for her reception table centerpieces.   Mason jars, wood rounds, flowers, some wood hearts with their initials burned into them.  The planner said, I hope you tried to talk her out of the Mason jars and into using something else. I understood what the planner meant,  Mason jars have been overdone and are out as far as  trends are concerned.  

I didn't try and talk my bride into something else for a few reasons.  The couple is in their early twenties, graduating college and buying a house.  When it comes to their wedding they're on a budget and both feel like while the wedding day is important, it's just one day out of the rest of their lives together.  They'd rather focus on and spend their money on their new house and making it a home together.   I love all these reasons for why this couple is having the wedding that they are.  The most touching reason why I didn't try and talk the bride into using something else was because these Mason jars were her grandma's.  The brides grandma canned a lot and every holiday her grandma's canned green beans would make an appearance on the table.  Sadly, her grandma is no longer with her.  By using her grandma's Mason jar's as part of her reception table centerpieces, she's honoring her grandma.  

Wedding-reception-crafting-mason-jars

One of the services I offer as a wedding consultant is wedding crafting.  The couples I specialize in are all about DIY'ing their wedding.  And my July bride is definitely DIY'ing as much as she can.  We met at her house along with some of her family, gathered all the supplies we would need and started crafting.   The bride wanted the burlap and lace ribbon wrapped around the jar and a jute bow around the top. 


Wedding-crafting-reception-centerpieces-mason-jars

We got started by measuring how much ribbon we'd need to go around the jar and hot glued the ribbon in place.  With 5 of us working on it we completed this part pretty quickly. 

Country-themed-wedding-crafting-mason-jars-reception-tables

After hot gluing the ribbon onto the Mason jars we cut the jute into strips and tied bows at the top of the jars.  The bride was really happy with how they turned out.  Her brother is going to cut some wood rounds for her that she'll set these jars on.   Gerbera daisies, babies breath and some greens will fill the jars.  Along with the Mason jars on the wood rounds will be little wood hearts with the couples initials burned into them.  Another crafting day may be in the works to make the little hearts.  This would be fun since I've never used a wood burning tool before. 

Country-themed-wedding-crafting-mason-jars-reception-tables

Wedding Crafting Service 

You want to DIY as much of your wedding as you can. Which means you're going to be crafting.  What happens if you have to do A LOT of crafting?  Or only a few of your friends are willing to help and you really need another pair of hands?  Or maybe you have enough friends to help you craft everything but you just don't have time to gather all the supplies? Or maybe you have enough friends, have all the supplies and you want to host a little party for your friends because they're helping but you just don't have the time?   All of these reasons is why I have a wedding crafting service.  I can be your extra pair of hands that you need. I can pick up all the supplies you need and deliver them to you. I can set up a little party for you and your friends to enjoy while you're crafting.   

I had a baker friend of mine ask me, Where were you when I was getting married?! I could have used this service.  😃  

If this is a service that interests you contact me for details- Tiffany.fizzyparty@gmail.com 

January 31, 2018


Valentine's Round Up

Valentine's Party Round Up 

Valentine's Day is a great time to spend some time with your girlfriends and I'm bringing you a round up of fun ideas to help you treat your friends with a party. 

BellaGrey Designs has some adorable tags perfect to attach to party favors.  Pick up some baby aloe plants and attach the tag "You had me at aloe"  or get creative with the "Lets stick together" tags and attach them to some nail polish and a nail file. 

Valentines Day Cactus themed Valentine's

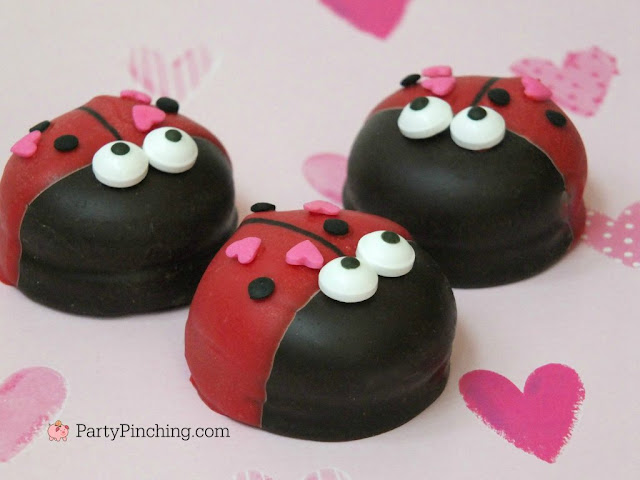
How stinkin cute would these lady bug marshmallow cookies be on your dessert table or put them in a cute little box and send them home as party favors.  Get the easy tutorial over at Party Pinching

Lady Bug treats for your Valentine's party

I HAD to include these chocolate covered marshmallow caramel hearts from The Partiologist because hello, caramel and marshmallows!  As a guest I wouldn't be able to pass these up. 


I like Joy in the Commonplace easy Valentine's tea idea. This party shows you that a party doesn't have to be stressful for the host. You can make your own cookies, scones or cinnamon rolls or you can pick some up at the local bakery.  Tea and treats is cozy and makes for easy conversation flow. 


Valentine's Day tea party. Tray with tea and breakfast treats .

A crafturnoon with friends is my kind of Valentine's party and   Revel and Glitter  shows us just how much fun it is.  From creating cards to a temporary tattoo station you'll be laughing, having a fun afternoon and making deep connections with your friends. 


Galentine's crafternoon dessert table with succulent backdrop

Show your girlfriends how much they mean to you by throwing them a brunch.  Jordan's Easy Entertaining  threw her friends a beautiful brunch and you can use some of these ideas to throw one of your own.  The story she tells of using her grandma's cake plate really touched me. Oh, and she has free printables for you too ;) 


Oh you know I have some ideas for you too.  A cookie decorating party brings out the creativity in your friends.   Don't forget the bubbles.  My friends had too much fun with them. 


Galentine's cookie decorating party

A Galentine's Day brunch can be a really easy party to throw.  Pick up all the food from the store or have your friends bring some to contribute to the party.  


Galentine's day brunch and dessert table

Will you be throwing a Valentine's party for your friends?

July 12, 2017


Deco Foil DIY

Let's Play with Deco Foil 


**Therm-O-Web sent me product to play with, woo hoo!!! **

While attending the SNAP conference I poked my head into the Therm-O-Web booth to see what crafting goodies they had.  My eye went straight to the shiny fun of Deco Foil.  As soon as I played with it I was envisioning all the fun party items I could create with it.  Like these wedding signs here.

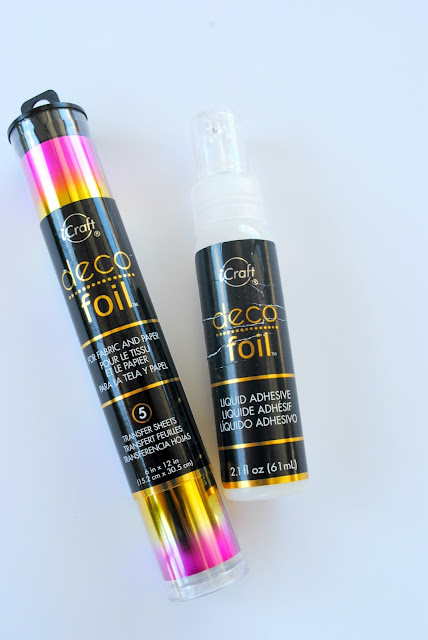
So lets dive in and see how easy it is to use Deco Foil.  You'll need some Deco Foil transfer sheets, I chose the Amethyst Watercolor and you'll also need the Deco Foil Liquid Adhesive.   And something you want to put the Deco Foil on.  A card, a sign, an arrow like I'm using in this tutorial.  By the way, I'll be totally honest here, I kinda suck at tutorials and I'm trying to get better. I usually don't take enough pictures but I think I took enough this time.  Ok, let's continue.

Deco Foil products used in DIY tutorial on fizzyparty.com

How pretty is this Deco Foil.  See why it caught my eye...

How to use Deco Foil. A diy on fizzyparty.com

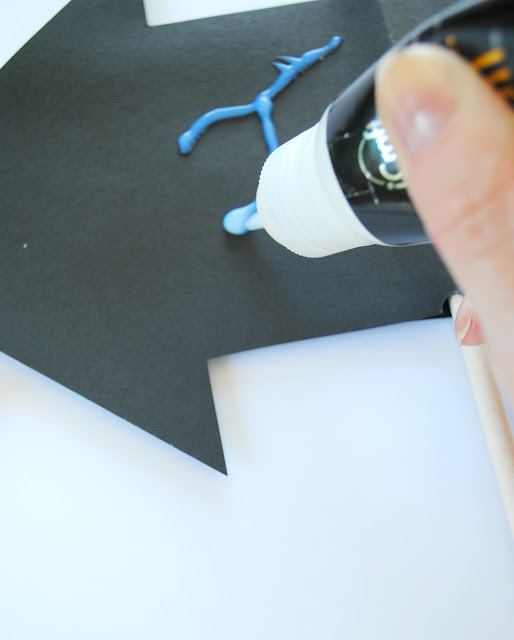
First thing you do is take the cap off the liquid adhesive and start writing or drawing on your medium.   I chose arrow signs from Oriental Trading.  Thank you Oriental Trading for sending them to me to play with.  The adhesive is so easy to apply.  It's just like writing with a pen.  As you can see I fudged a little on the upper line there.  But it's still really easy to use.

Deco Foil diy- Step one on fizzyparty.com

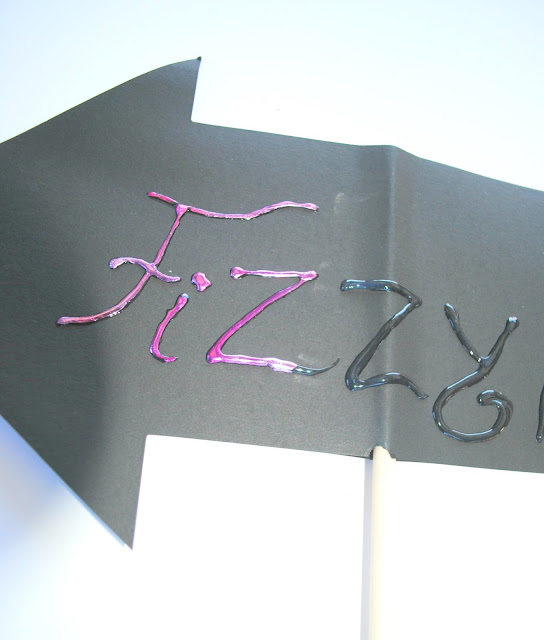
I got a little too much adhesive on the bottom of the F there but I was trying to take a photo and write at the same time. I probably shouldn't do that. You can see how smooth the adhesive flows.

Deco Foil diy step-by-step on Fizzyparty.com

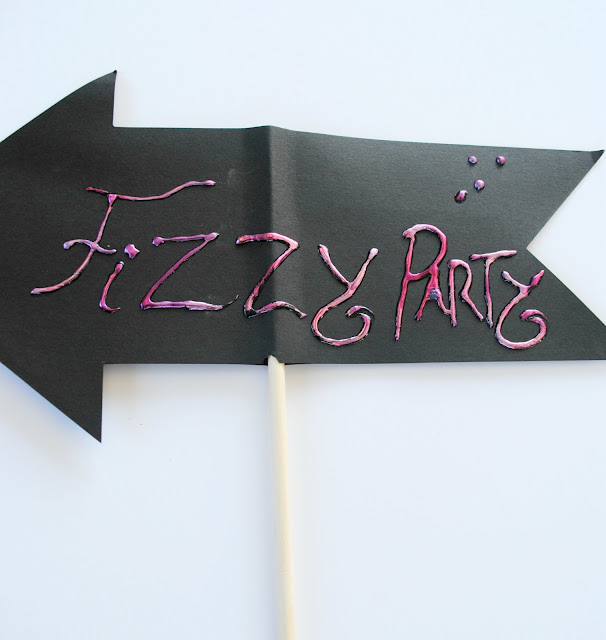
I got a little carried away with the Fizzy and almost didn't leave enough room for the Party.  I suggest practicing on scrap paper if you want to make sure the finished words or pictures are perfect. After you've written or drawn what you want you let it sit for 1 to 2 hours.

Deco Foil adhesive, step one of the process. See all the steps on Fizzyparty.com

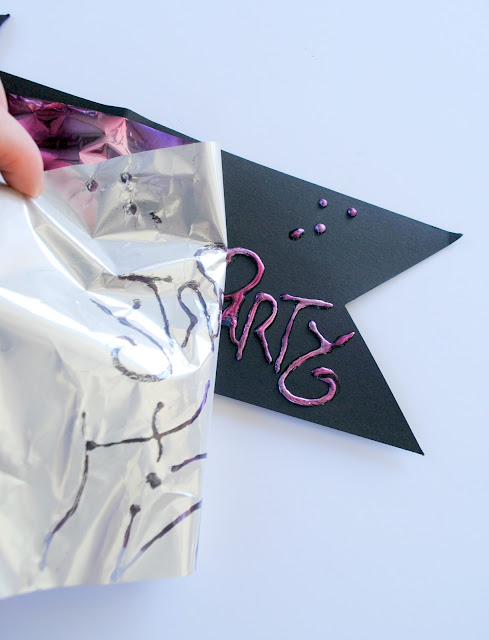
After the 1 to 2 hours has passed, I usually wait 2 hours just to make sure the adhesive is nice and dry, you grab your foil sheet and place it over the adhesive letters or picture.  Than you just rub with your finger or nail.

Deco Foil diy. Apply Deco Foil. See all steps on fizzyparty.com

Look how easy that is.  You can see how the foil just transfers right onto the adhesive and not onto the paper anywhere else.  I'm not careful when I rub either, I don't make sure I'm just rubbing the foil onto the adhesive only.  If you happen to rub the foil where there's no adhesive it's no biggie because it only transfers where there is adhesive.


Deco Foil diy, how to apply it. See the whole tutorial on fizzyparty.com


I applied the Deco Foil over all the words and rubbed and than peeled it off.  The other great thing is, if you happen to miss a spot or the colour didn't transfer as well as you'd like, just lay the foil on top of the spot, rub and remove the foil. The spot missing colour will now have colour.

Deco Foil diy on the blog, fizzyparty.com

Ta-Da! The finished product. As you can see there are a few spots that I probably should have gone back over with the foil.
Deco Foil finished product. See the tutorial on fizzyparty.com

Deco Foil works great on wood too.  See how I used it on wood here

Who's wants to play with Deco Foil now?
If you have a project in mind leave me a comment and let me know. I'd love to see what other creative ideas people have.

Shop this craft:
Therm-O-Web
Oriental Trading

Did you know I'm on Instagram?  You can find me here.

Related:  Fun with Deco Foil 

July 11, 2016


Trinket Dish Craft Night

#FizzyPartyTropFest

Have you heard of Fizzy Party Trop Fest?  It's a fun craft night, networking and so much more event taking place in Portland, Oregon on July 27, 2016 at Opal 28  Limited tickets available so be sure to get yours before they're all sold out!! I'd LOVE to have you come craft with me. And be sure to tell your friends! We'll be painting fun trinket dishes.  I'll have pineapple shaped ones and circular ones ready to paint. 


I've been busy making pineapple shaped trinket dishes for the event.  Plain and ready for your colourful creations. 
#FizzyPartyTropFest naked trinket dish

I have to have a sample one for the attendees so I got out the paints and glitter which I'll be bringing to the event, of course! Glitter is a must for my crafting.  My inspiration was this adorable pillow I created at Shutterfly with a graphic created for me by Small Moments.
Trinket dish painting supplies

I started out painting it with a base colour of pineapple yellow then added the smiley face and red hearts eyes which look so much better with glitter don't you think.
Pineapple trinket dish painting, face

Freckles added!
Pineapple trinket dish painting

Time to add the festive pineapple top.  Multiple colours of green give it depth and...GLITTER!!!
Pineapple trinket dish with glitter

Ta-Da!  My finished little trinket dish.  Isn't he cute :D  Come out and paint one with me and enjoy a huge dessert bar, so many photo ops you'll blow up your Instagram and some serious swag!!
Pineapple trinket dish for Fizzy Party Trop Fes

Come out for an evening of FUN!!!! Tickets available HERE   The first 10 people to come get a super special swag bag, woo hoo!!!!

May 4, 2015


Craft Warehouse


I'm SO excited!!! Craft Warehouse is open again. It was open years ago about 15 minutes from me and then sadly it closed.  It's back and now only 1 mile away! I have a feeling the clerks are going to know me by name. It will be like Cheers, when I walk into Craft Warehouse all the employee's will say, TIFFANY. I absolutely love this store. Craft Warehouse has items you can't find anywhere else. Shall we take a look?

You bet it's a PARTY! I was squealing with happiness down every aisle I walked.  I was almost doing the happy dance, seriously. I'm already wanting to incorporate these marquee PARTY letters into a party. 
Beach aisle. Walking down this aisle I started planning another party on the beach. I had such fun with the Go Fly a Kite party. 
 One thing I love about Craft Warehouse is the displays. So full of inspiration and colour. I have just the party in mind for some of the items in this display. 
4th of July inspiration. Each aisle is broken down into occasions which makes shopping very easy. Inspirational projects are found throughout all the aisles with all the products you need to re-create them near by. 
 
EEEeeeeeeee!!! paper mache letters in so many sizes. LARGE to small. So much creativity is going to start happening. Not only are these letters great for parties but they're good for home decor too. 
 Garden and mini items aisle. I see fairy, woodland and garden parties down this aisle. 
Woodland aisle. The closest I've come to a woodland party so far is the Irish Elk   one I did in Montana. This aisle has my brain creating a woodland themed party. 
Scrap booking aisle. So many wonderful choices. These aisles have me wanting to create my own cards again. 
 Summer aisle. You can't help but smile when you come to this aisle.  Look at those colours! 
If you live in the Portland metro area and love to craft, you really need to check out Craft Warehouse in Beaverton.  I'm sure you'll see me there when you go ;)